
Introduction
Modular upholstery is often sold on the promise of flexibility: a retailer can display a compact arrangement, combine additional seats for a larger room, or offer replacement components instead of requiring a customer to purchase a complete new set. For wholesalers and importers, that flexibility only creates value when the modules connect reliably, can be assembled without confusion and remain compatible across repeat orders.
The most expensive problems are often hidden beneath the upholstery. Weak brackets, poorly positioned connectors, inconsistent frame dimensions and unclear instructions can turn a flexible design into a source of customer complaints. Shipping can add another layer of risk: loose hardware may scratch fabric, unprotected corners may be crushed, and a carton that fits the frame may not protect the connection points. Once a shipment reaches a distribution center, these problems can mean repacking, replacement parts, delayed delivery or a full return.
This guide treats modular sofa assembly and reconfiguration as a sourcing and quality-control process rather than a consumer DIY task. It explains how to compare connector systems, verify repeated assembly, control knockdown packaging, audit factory reports and prepare documentation for retail and contract channels. The aim is to help purchasing teams confirm that the modular concept works in production, in transit and after delivery-not only in a showroom demonstration.

Connection Hardware: What Buyers Should Validate Before Ordering
Connector selection affects usability, stability, packing design and service costs. A connection that is secure but difficult to engage can frustrate installers. A connector that is easy to use but allows modules to separate during normal movement can generate complaints. Buyers should evaluate the complete joint system with the frame, upholstery and intended configuration rather than comparing hardware in isolation.
Common connector approaches
Interlocking metal brackets can provide a positive mechanical connection when the bracket geometry and mounting points are correctly designed. Buyers should inspect the thickness and finish of the metal, the quality of the fasteners, the bracket alignment and the reinforcement supporting the mounting point. Thin stamped parts or poorly supported screws may deform or loosen under repeated use. Ask whether the hardware supplier has a material specification and whether the factory performs incoming inspection.
Spring latches can allow quick engagement and release. Their performance depends on spring quality, alignment, access for the user and the design of the receiving component. Test whether the latch engages fully without requiring unusual force, whether it can be released intentionally, and whether it remains secure when the modules are moved during normal use. A latch that works only when a worker applies pressure at a precise angle may not be suitable for a straightforward retail assembly experience.
Bolt-on fittings can provide a firm joint and may be useful where the connection is not expected to be changed frequently. They require accessible fasteners, suitable inserts and clear instructions. If tools are required, include them where appropriate and make sure the fastener locations remain accessible after upholstery. Repeated tightening can damage weak inserts or compress soft materials if the joint has not been designed for it.
Magnetic connectors may help guide pieces into position, but buyers should establish whether the magnets are intended to align modules or to provide the primary restraint. Magnetic attraction alone should not be assumed to prevent separation under every use condition. Ask the factory to explain the load path and identify any mechanical retention features.
Each approach has trade-offs. There is no universally best connector for every design. The right choice depends on the module weight, joint geometry, expected frequency of reconfiguration, packaging format and whether the final product is intended for residential retail, hospitality or another commercial use.
Inspect the joint as a system
Ask the supplier to show the connector before upholstery and again on a finished sample. Verify that the hardware is mounted at consistent positions, the surrounding frame is reinforced as specified, and the connector does not interfere with the fabric or create a sharp edge. Inspect the connection from both sides and check whether upholstery tension makes engagement difficult.
The buyer should also check the effect of the connector on layout alignment. Connected modules should sit at the intended height, with consistent gaps and no obvious twisting. The joint should not force the upholstery into a pinch point or create a hard ridge that users can feel through the seat.
Record connector type, supplier, material or finish specification, fastener type, mounting position and approved drawing revision. If a factory proposes a substitution because a component is unavailable, require written approval and assess whether the change affects performance, corrosion resistance, appearance, assembly instructions or testing.
Define a repeatable assembly test
A showroom demonstration is not enough. Ask the factory to assemble and separate representative modules repeatedly using the approved instructions. The test plan should define the number of cycles, the method, the components tested and the acceptance criteria. There is no single cycle count that is appropriate for every design; it should be selected according to the intended use and agreed with the supplier or testing specialist.
After cycling, inspect for loose fasteners, bent brackets, worn latch surfaces, damaged inserts, increased play, fabric abrasion and changes in the effort needed to engage or release the joint. Record failures and corrective actions. If a connector is replaced or its mounting position changes, repeat the relevant checks on the revised construction.
Knockdown Design, Packaging and Freight Loss Control
Knockdown or semi-knockdown packaging can improve container utilization and handling, but only when the design protects the product and the assembly process remains manageable. A smaller carton is not automatically a lower-cost solution if it increases labor, damages upholstery or creates more service calls at the destination.
Compare flat-pack and semi-knockdown approaches
A fully knockdown design may reduce the volume shipped per unit, but it can require more assembly steps and create more opportunities for missing hardware or incorrect installation. A semi-knockdown arrangement may preserve some factory assembly and simplify the customer's task, while occupying more space. The right option depends on the frame design, shipping distance, warehouse process, delivery channel and the cost of destination assembly.
Ask the supplier to quote the packaging configuration, number of cartons per set, carton dimensions, gross weight and the components that will be assembled before shipment. Review whether connectors are protected from impact and whether the package can be handled without placing pressure on upholstered surfaces. Compare the total landed cost, including packing labor, freight, receiving, assembly and likely after-sales handling-not just the factory unit price.
Protect fabric, corners and connection points
Hardware should be bagged or boxed so it cannot move freely inside the carton and scratch the frame or fabric. Label bags clearly by module or assembly step. Small fittings can disappear into packaging folds or be overlooked during receiving, so use a defined packing checklist and verify hardware quantities before sealing the carton.
Upholstered corners and exposed legs need appropriate protection. Foam sheets, corner guards, protective covers and internal bracing should prevent movement without creating pressure marks or trapping moisture. Packaging materials should be compatible with the fabric and finish; test for transfer, abrasion and staining where needed. Do not assume a package is adequate because it survived one hand-carried sample shipment.
The factory should document the packing sequence with photographs or work instructions. During inspection, verify that the production team follows the approved sequence and that the correct hardware pack, assembly guide and product labels are included. A carton drop or distribution simulation may be appropriate based on the shipping route and product risk. ASTM D4169 provides a framework for evaluating shipping containers and systems under distribution hazards; the applicable distribution cycle and assurance level should be selected for the actual shipment rather than copied indiscriminately.
Reduce damage without inventing a universal loading number
Container loading capacity depends on carton dimensions, container type, weight limits, stacking rules, loading method and protective packaging. Buyers should request a loading plan based on the actual final carton specification. If a carton changes after the plan is approved, recheck the loading calculation and stability of the stack.
Track damage by failure type: crushed corners, torn fabric, bent connectors, missing hardware, moisture damage or frame breakage. The data can help identify whether the corrective action belongs in product design, packing materials, loading instructions or carrier handling. Avoid using a single generalized "damage reduction percentage" unless the company has a documented baseline and comparable shipment records.
For a knockdown modular sofa for wholesale program, package design should be approved alongside the product-not after the production run has started. This prevents a common sourcing problem in which the furniture is finished but the carton cannot protect the connector locations or meet the agreed shipping method.
How to Audit Factory Assembly and Reconfiguration Test Reports
A useful test report allows the buyer to connect a result to a specific product, sample and specification. A certificate with no model number, unclear specimen description or missing test method may not be sufficient for a technical review or a project approval.
What a credible report should contain
Request the laboratory or factory report identification, test date, product model, specimen details, construction represented, test method and edition, equipment where relevant, results, observations and acceptance criteria. If the report covers a family of products, ask which variations are included and what technical rationale supports that coverage.
For internal factory testing, review the work instruction, sample selection, calibration status of any measuring equipment, operator records and corrective-action history. An in-house report can be useful evidence of process control, but it should not be presented as independent third-party certification. Where a buyer or project specification requires an accredited laboratory, verify the laboratory's accreditation scope and confirm that the relevant test is covered.
Test the configurations that matter
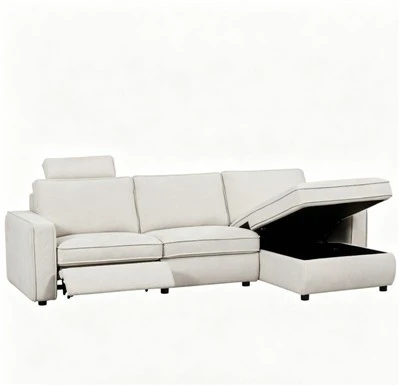
Do not test only the easiest two-piece connection if the collection includes corner units, chaise modules and multiple orientations. Identify the combinations most likely to be sold and those with the greatest mechanical complexity. Check assembly access, connector engagement, alignment, stability and the ability to separate the pieces without damaging upholstery.
Where a modular set is designed to be reconfigured, confirm the permitted layouts in the product documentation. Some pieces may be visually similar but not interchangeable because the connector orientation, frame width or arm construction differs. The assembly guide should make those limitations explicit.
After testing, inspect the joint and surrounding frame for movement, deformation, loose fasteners, wear and fabric damage. Record any increase in play or change in operating effort using the method agreed before the test. If a failure occurs, require root-cause analysis and evidence that the corrective action has been validated on a revised sample.
Manage engineering changes across production batches
A revised connector, a new hardware supplier or a change in frame dimensions can break compatibility with earlier stock. Require change notification for connector geometry, mounting points, frame drawings, foam specifications, fabric articles, carton design and assembly instructions. Each purchase order should reference the approved revision.
For repeat orders, assemble a small compatibility set that includes components from the current production batch and, where available, a retained reference component from an earlier batch. This is especially useful when retailers may sell add-on seats months after the original purchase. If a design revision makes old and new modules incompatible, the commercial implications should be assessed before the revised parts are shipped.
Wholesale Sourcing Checklist: Reduce Assembly Complaints and After-Sales Cost
Before placing a bulk order, purchasing teams should verify product design, production control, packaging and support as one process.
Confirm the intended use. Identify whether the collection is residential retail, hospitality, co-working or another contract application.
Approve the module library. List compatible module codes, permitted layouts and any pieces that are orientation-specific.
Record connector specifications. Identify the hardware type, material or finish, fasteners, mounting points and drawing revision.
Validate assembly. Run a repeatable assembly and separation test with agreed criteria and retain the results.
Review the packaging plan. Confirm carton dimensions, hardware packs, corner protection, labels and assembly instructions.
Set inspection requirements. Define sampling, defect classification, critical dimensions and the evidence needed before shipment release.
Check documentation. Ensure the product model, test reports, BOM and packaging records refer to the same approved version.
Plan spare parts. Ask about replacement connectors, fasteners, legs, cushion covers and the availability period for key components.
Control changes. Require written approval before substitutions or revisions that may affect fit, safety, appearance or compatibility.
Track field complaints. Record missing hardware, assembly errors, loose connections and transit damage by model and shipment.
For modular sofa assembly and reconfiguration, buyers should request a demonstration using production-representative modules, not only a specially prepared sample. A knockdown modular sofa for wholesale should be evaluated on total landed cost and assembly risk, while a reconfigurable sectional sofa bulk sourcing plan should specify how component compatibility will be maintained across repeat orders.
Explore the modular sofa collection as a starting point for product discussions, then confirm current availability, connector details, packing configuration and any required test evidence directly with the supplier.
Sources
BIFMA - Standards overview and seating standards: https://www.bifma.org/standards/
ASTM International - ASTM D4169, Standard Practice for Performance Testing of Shipping Containers and Systems: https://www.astm.org/standards/d4169.htm
International Organization for Standardization - ISO standards catalog: https://www.iso.org/standards.html
American Home Furnishings Alliance - Furniture industry resources: https://ahfa.us/
Furniture Today - Furniture industry news and market coverage: https://www.furnituretoday.com/